Why Your Crank Arm Keeps Coming Loose
Spin bike maintenance has gotten complicated with all the conflicting advice flying around. As someone who spent three weeks blaming a perfectly innocent frame for a crank problem, I learned everything there is to know about this particular headache. Today, I will share it all with you.
The short version: two mechanical failures cause this. Which one you’re dealing with changes everything about the fix.
The first is undertorquing. Someone hand-tightened the crank bolt, assumed it was snug, and moved on. It wasn’t. No real clamping force means the bolt gradually backs itself out — and you’re stuck in this exact loop of tighten, ride, repeat. You’ll recognize this version because the crank wiggles right away, but the hole itself looks clean when you inspect it.
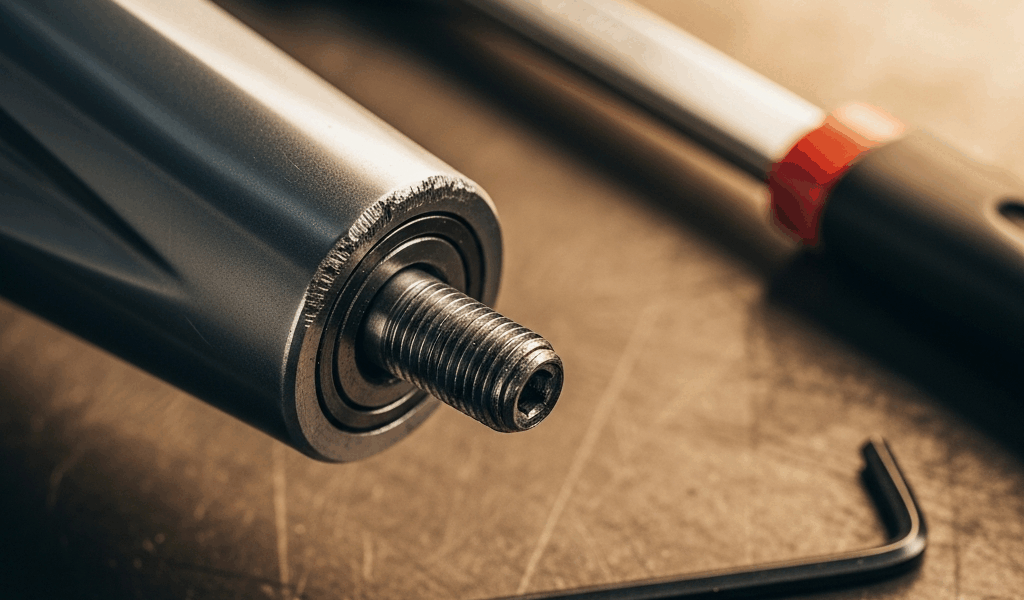
The second is stripped interface damage. But what is interface damage, exactly? In essence, it’s what happens when the square taper or splined connection between the crank arm and spindle wears oval from too much micro-movement. But it’s much more than cosmetic — once that hole goes oval, no correctly torqued bolt in the world will hold it. There’s simply nothing left to grip.
Here’s the detail most guides miss entirely: the drive-side crank arm on most spin bikes has a left-hand thread. That means you turn it clockwise to loosen and counterclockwise to tighten. Probably should have opened with this section, honestly. I’m apparently someone who assumes all bolts work the same way, and my socket wrench spent a full five confused minutes making things worse before I figured that out. Don’t make my mistake. Reverse threads exist for a reason — they fight the natural pedaling motion that would otherwise unscrew a standard bolt mid-ride.
What You Need Before You Start
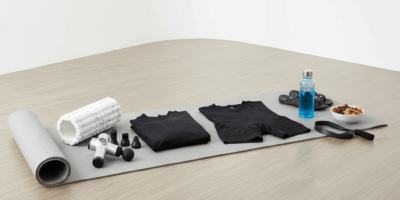
While you won’t need a full mechanic’s workshop, you will need a handful of specific tools. Gather these before you touch anything.
- Crank puller — A screw-on sleeve with a center bolt that separates the arm from the spindle. Runs $15–40 depending on quality. Get one sized to your crank arm diameter — without it, a tight taper isn’t moving.
- Socket wrench (8mm or 14mm) — Most spin bike cranks take an 8mm bolt. Some Peloton models and commercial equipment jump to 14mm. Check your manual or just measure the bolt head before buying anything.
- Torque wrench — A click-type model rated 0–60 Nm runs $25–80. This might be the best investment here, as crank installation requires precision that guesswork simply can’t provide. That is because overtorquing by even 5 Nm permanently deforms the square taper interface — and undertorquing puts you right back in this situation in two weeks.
- Threadlocker fluid — Loctite 243, the blue medium-strength version. About $6 a bottle. Insurance against vibration loosening, not a substitute for correct torque.
- Dust cap tool or flat-head screwdriver — That plastic or aluminum cap over the bolt comes off first. Every time.
Never ride a bike with a loose crank — at least if you want to avoid a mid-class fall or a completely destroyed taper interface. A single 45-minute session on a wobbling crank can cause damage that turns a $40 fix into a $150 one. This is not a “ride it until it gets worse” situation.
How to Tighten a Loose Spin Bike Crank Arm
So, without further ado, let’s dive in.
- Remove the dust cap. Flat-head screwdriver, plastic pry tool, or whatever end of the crank puller fits. These caps are generic black plastic and damage easily — set it somewhere you’ll actually find it again. Replacements run about $3 if you don’t.
- Identify the thread direction. Right side crank arm — non-drive side — is standard right-hand thread. Counterclockwise loosens, clockwise tightens. Left side — drive side, where the big ring sits — is reverse-threaded. Clockwise loosens it. Counterclockwise tightens. Read your manual if anything feels uncertain. Getting this backwards is infuriating but fixable, and I say that from personal experience.
- Set your torque wrench to 33–40 Nm. That range covers most square taper spin bike cranks. Peloton bikes specifically call for 34 Nm. SoulCycle equipment typically lands at 35 Nm. Slot your socket onto the bolt, apply steady pressure in the correct tighten direction, and stop the moment you hear the click. That click is the wrench telling you it’s finished. Don’t keep turning.
- Apply threadlocker if this crank has come loose before. First time loosening? Torque alone might be enough. Second time? That’s a pattern. One small drop of Loctite 243 on the bolt threads — not the whole bolt, just the threads — and let it cure 24 hours before you ride again.
- Replace the dust cap. Press it firmly until it seats. Keeps moisture and grit off the bolt.
After tightening, grab the crank arm below the pedal and push side-to-side. Zero play. None. If it still wobbles after correct torque, the taper interface is already damaged — and tightening won’t save it.
When Tightening Alone Won’t Fix It
Frustrated by a crank that still wobbles after hitting the correct torque spec, most people keep tightening and tighten some more using pure determination and whatever muscles they have left. That doesn’t work. This new understanding of why took off gradually in the home fitness community and eventually evolved into the diagnostic approach enthusiasts know and trust today.
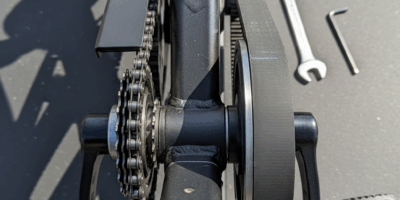
Here’s the test. Torque the bolt to spec. Grab the crank, wiggle it side-to-side. Click sound? Any play at all? The taper is gone — worn oval from weeks of micro-movement. That’s what makes the square taper connection so unforgiving to us spin bike owners who ignored the early warning signs.
Two options from here. Order a replacement crank arm online — $40–150 depending on your specific bike model — and install it using the same process above. Or bring the bike to a local spin studio or bike shop, pay $60–100 in labor, and have someone verify the spindle itself isn’t gouged. A damaged spindle means the entire crank assembly needs replacing. That costs more.
Honestly, most people just order the part. Ships in 2–3 days. Installation takes 10 minutes once you have the crank puller and torque wrench already in hand.
How to Stop It from Happening Again
First, you should check your crank bolts every 4 to 6 weeks — at least if you’re riding three or more times weekly. Thirty seconds. Grab the crank, verify no wobble. Catch it early and you prevent taper damage entirely.
Re-torque to spec every few months. After installing a freshly tightened or brand-new crank, do a second torque check after the very first ride. Temperature swings and vibration settle bolts in ways that surprise people every time.
Apply Loctite 243 every single time you reinstall the bolt. One drop. Cure fully before riding. I’m apparently someone who skipped this step for years and wondered why the problem kept returning, and that blue bottle now lives permanently in my tool drawer next to the torque wrench.
Avoid standing climbs on any bike showing even slight crank play. Standing sprints transfer enormous force through the pedals — a compromised crank can give way suddenly, and the wobbling accelerates taper damage faster than most people expect.
A loose crank is genuinely fixable. Proper torque and a $6 bottle of threadlocker handle it almost every time. The only question is whether you catch it before the taper goes oval — or after.

Leave a Reply