Why Your Spin Bike Pedals Keep Coming Loose
Spin bike pedals have gotten complicated with all the conflicting advice flying around. So let me cut straight to the thing nobody tells you: the left pedal has reverse threading. Not on certain premium models or vintage bikes — on basically every spin bike ever manufactured. The left pedal tightens clockwise and loosens counter-clockwise, the exact opposite of everything else you’ve ever turned with a wrench. I spent three months re-tightening my Peloton pedals every other week before I figured out I’d been tightening them the wrong direction the entire time. Don’t make my mistake.
The second culprit is torque — or the lack of it. Hand-tightening a pedal until it feels snug isn’t enough. Not even close. Pedals need 35 to 40 Newton-meters of real, committed force. Most people undershoot it. The pedal arm starts to move. Heat builds from friction. The threads walk themselves loose a little more each ride. Then you’re back here, frustrated, reading this article again.
Tools You Need Before You Start
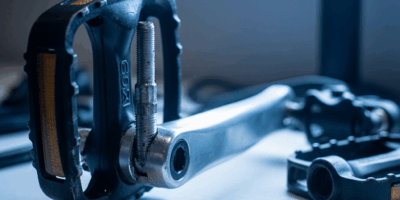
While you won’t need a full mechanic’s garage, you will need a handful of specific tools. Most spin bikes ship with 9/16-inch pedals featuring a flat wrench surface, so a 15mm pedal wrench is your go-to — or a standard adjustable wrench set to that width. Some models are different, though. Keiser bikes and a few boutique stationary brands use a 6mm Allen key inserted from the backside of the crank arm instead. Check your manual first. Fifteen seconds of reading saves you standing there holding the wrong tool entirely.
A torque wrench might be the best option here, as proper pedal installation requires consistent, measurable force. That is because “firm enough” means something different to everyone, and 37 Nm is the target that actually holds. Most home gym owners don’t own one — and honestly, that’s fine. The fix still works if you understand the core concept: hand-tight is not pedal-tight.
Anti-seize compound helps too, especially if you’ve pulled the pedal more than once already. A thin coat on the threads stops corrosion from forming and makes your next removal way less of a fight. Loctite Blue threadlocker is another option — removable, not permanent — though it’s optional unless your pedals keep backing out even after you’ve hit proper torque.
Step-by-Step Fix for Loose Spin Bike Pedals
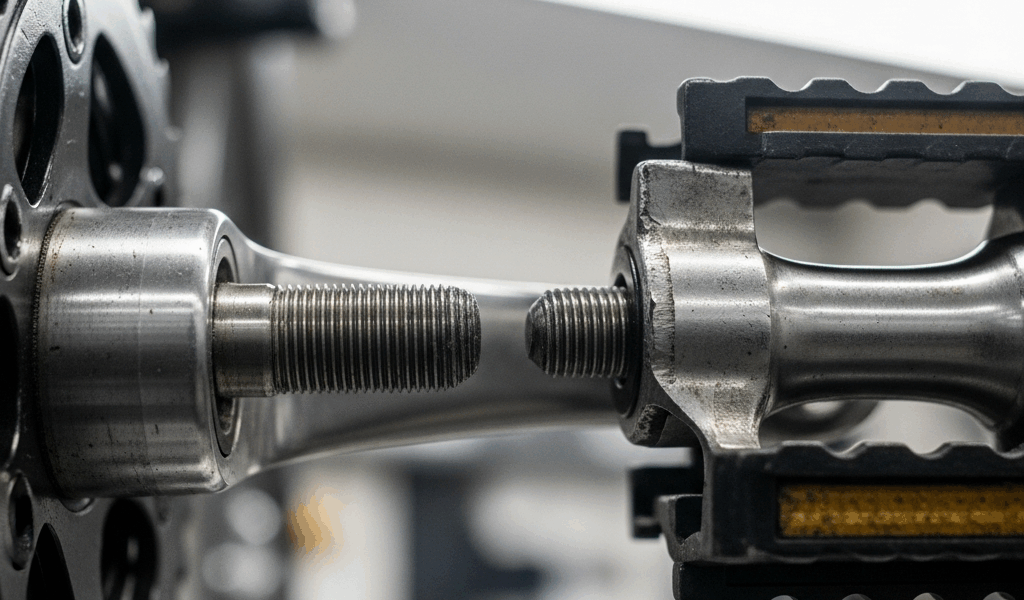
- Identify which pedal is loose. Left or right — it matters more than you’d think. Rotate the crank arm until you can see the “L” and “R” stamped into the metal. No markings? The pedal on your left side while seated is the left pedal. Simple enough.
- Position yourself for real leverage. Stand beside the bike so you can press down steadily on the wrench. You need mechanical advantage here, not just wrist strength and optimism.
- Remove the loose pedal correctly. Right pedal: wrench goes counter-clockwise. Left pedal: wrench goes clockwise. That’s the reverse-threading in action. If you’re second-guessing yourself, test it by hand first — you’ll feel the resistance drop once you’ve found the right direction.
- Hand-thread the pedal back in before touching the wrench. Spin it in by hand until it seats fully against the crank arm. You’ll feel the resistance build as the threads engage. Stop at solid contact. This step exists entirely to prevent cross-threading, which turns a five-minute job into a much worse afternoon.
- Tighten with the wrench. Right pedal: counter-clockwise, one firm quarter-turn past hand-tight. Left pedal: clockwise, same thing. Apply steady, confident pressure — not violent torque, just firm commitment. Without a torque wrench you’re aiming for what I’d describe as “no-doubt tight.” That’s your 35 to 40 Nm ballpark.
- Tighten the other pedal the same way, even if it feels perfectly fine right now. Pedals that aren’t matched in tension develop play faster. Two minutes to do both sides beats one side loosening in a week.
- Spin the crank by hand. The pedals shouldn’t rotate independently of the crank arm at all. Any wiggle, any play — they’re still loose. Go back to step five.
What to Do If the Pedal Still Loosens After Tightening
Probably should have opened with this section, honestly. If you’ve tightened everything correctly and the pedal still backs out after a few rides, the crank arm threads are stripped. The threading is just gone. That’s a different problem — but it’s still fixable.
First option: Helicoil thread inserts. These are small metal coils that press into a drilled-out hole and create fresh threads inside the damaged one. You’ll need a Helicoil kit sized specifically for 9/16-inch pedal threads, a drill, and the matching drill bits. Kits run about $15 to $30. The job takes 30 minutes if you’ve done it before, closer to an hour if this is your first time. There are solid YouTube walkthroughs — search your exact bike model. Worth attempting if you’ve got some mechanical confidence and a free Saturday morning.
Second option: replace the crank arm outright. Most spin bikes use removable crank arms held on by a single bolt. Replacements run $40 to $120 depending on your model. Removal and installation is genuinely straightforward — one wrench, roughly five minutes per side. This is honestly the faster move for most people and leaves you with factory-fresh threads that’ll outlast everything else on the bike.
You’ll need your exact bike model to source the right part. Check the manual, or look for a label on the frame itself — usually near the bottom bracket. Call the manufacturer’s support line if you’re unsure. Most ship parts within a week. I called Peloton support at around 9 a.m. on a Tuesday and had a part number in under four minutes.
How to Stop Spin Bike Pedals From Loosening Again
After tightening or replacing, check the pedals again after your first three rides. I know — annoying. But new or re-installed hardware needs a break-in check, and one two-minute inspection after ride three saves you six weeks of gradual frustration. That’s the trade-off.
Apply a small amount of anti-seize compound to the threads before the next installation. A light coat, not a glob. This matters especially if you live somewhere humid or if your spin bike lives in a garage. I’m apparently sensitive to this — I’m in coastal Virginia and Permatex anti-seize works for me while skipping it entirely never ends well.
Avoid riding with any play in the pedals at all. Even a millimeter of movement creates stress that accelerates thread wear. If something feels slightly off mid-ride, spend 30 seconds at the wrench before your next session instead of pushing through it.
This is a fixable problem. A fully fixable one. And you’ve already cleared the biggest hurdle — understanding the reverse threading on the left side — just by reading this far. That’s the part that trips everyone up.
Leave a Reply