Your First Spin Class — What to Expect and How to Not Die
Spin classes have gotten complicated with all the conflicting advice flying around. As someone who’s been teaching indoor cycling for going on six years, I learned everything there is to know about what actually happens to first-timers the moment they walk through that studio door. And I can tell you right now — you’re going to be fine. Exhausted in a way that’ll surprise you, but fine. This isn’t sponsored content. No Peloton affiliate links, no SoulCycle package to sell you. Just the honest rundown, because finding straight answers about this stuff is weirdly difficult.
What to Wear and Bring
Gear questions flood my DMs almost every week — and getting this wrong makes your first class harder than it needs to be. Let’s just sort it out.
The Clothing Situation
Padded cycling shorts or fitted leggings. That’s the rule. The padding matters more than you’d think — your sit bones are about to spend 45 minutes on a very narrow saddle, and they will absolutely let you know about it afterward. Brands like Pearl Izumi and Castelli make dedicated cycling shorts with chamois padding built right in; the Pearl Izumi Quest Short runs around $65 and is worth every cent if you’re planning to ride regularly. Testing the waters with a single class? Your regular fitted leggings work fine — just nothing loose or flowy.
No baggy fabric. Seriously. Loose shorts can catch on the seat when you stand up, which is both embarrassing and a genuine tripping hazard when you’re dismounting on jelly legs post-class.
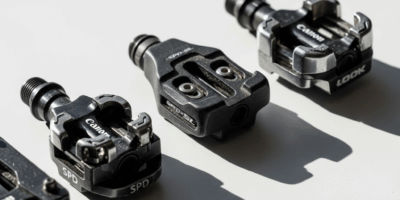
Shoes — if the studio rents clip-in cycling shoes, usually $3 to $5, rent them. They lock into the pedals and let you pull up through the stroke instead of just pushing down. The efficiency difference is real. But here’s something I wish someone had told me before my first class in rentals: bring a thin pair of socks you don’t mind sacrificing. Rental shoes have been on a lot of feet. Also, if you already own road cycling shoes with SPD-SL or Look Delta cleats, call the studio first. Most spin bikes use the SPD two-bolt system — wrong cleat and you’ll just stand there looking confused while the instructor stares at you.
Sticking with regular sneakers? Make sure the sole is stiff. Running shoes with thick cushioning compress against the pedal and kill your power transfer — a cross-trainer or court shoe is better. And don’t break in new shoes at a spin class. I made this exact mistake during a certification training weekend and had blisters on both heels by hour two. Don’t make my mistake.
What to Actually Pack
- Water bottle — not a small one. Full 32 oz minimum. The sweating will surprise you.
- A small towel for your handlebars and face. Some studios provide them. Many don’t.
- An extra hair tie if that applies to you. One will break. It always breaks.
- A light snack for after — banana, handful of almonds, something with both carbs and protein. Don’t eat a full meal right before, but don’t roll in having fasted since breakfast either.
How to Set Up Your Bike
Probably should have opened with this section, honestly. Bike setup is the single biggest difference between a class that feels manageable and one that wrecks your knees — and bad setup can actually hurt you over time, not just feel uncomfortable.
Seat Height
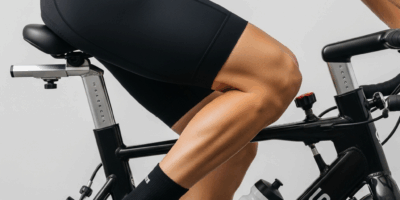
Stand next to the bike. Find your hip bone — that pointy part on the front of your pelvis. Set the seat so the top of the pad lines up right there. Once you’re clipped in, you want a slight bend in your knee at the bottom of the pedal stroke. Not locked out straight. Not a deep squat either.
Too low and your kneecap takes the abuse. Too high and you’ll rock side to side reaching for the bottom of each stroke, which pulls on your hips and lower back. Get this dialed in before anything else.
Handlebar Height
For your first class, set the handlebars level with your seat or slightly above it. More upright than experienced riders use — and that’s exactly the point. It takes pressure off your lower back and lets you focus on your legs rather than fighting to hold yourself up with a core that isn’t used to this yet. You can lower the bars gradually as you build strength over time.
Fore-Aft Seat Position
Slide the seat forward or backward until your pedals are horizontal — 3 o’clock and 9 o’clock positions — and your front knee sits directly over your front foot. That’s where your patella wants to be. Most beginners skip this adjustment entirely and just ride whatever position the last person left it in. That’s a mistake.
Ask the instructor to check your setup before class starts. Every decent instructor expects this from first-timers — it takes two minutes and it genuinely matters. I’ve never once been annoyed when a new rider asks me to look at their bike. What actually bothers me is when they don’t ask, then spend 45 minutes in a position that guarantees they’ll never come back.
What the Class Is Actually Like
A standard spin class runs 45 to 60 minutes. Warm-up, main set, cool-down — most classes follow that same rough arc whether it’s a beginner ride or a regular group session. Here’s what those sections actually feel like when you’re in the room.
The First Ten Minutes
Easy pace, low resistance — this is your warm-up. The instructor will call out cadence, which is pedal speed, usually in RPM. Most studio bikes don’t have gauges, so they’ll describe it instead: “slow jog pace,” “brisk walk.” Trust the description more than any number they throw out.
The music hits loud immediately — that part catches people off guard. Spin studios are not quiet gym environments. You’ll feel the bass in your chest. This is intentional; the music drives both cadence and energy in the room. Sensitive to volume? Bring earplugs. Zero judgment.
The Main Set
This is where things get hard. Intervals alternate between high effort and recovery. Climbs mean heavy resistance and slower pedaling — usually seated or in a standing “run” the instructor leads the class through. You’ll hear cues like “add two turns” or “climb to a seven out of ten effort.”
Here’s what I need you to actually hear: sitting down when the instructor calls a standing run is completely fine. Dropping your resistance when everyone else is grinding up a climb is completely fine. Nobody in that room is watching you — they’re staring at the floor or into the middle distance trying to keep their own legs moving. First-timers always think they’ll stand out by sitting down. They won’t. I barely notice from the front of the room, and I’m the one being paid to pay attention.
The Cool-Down
Last five to eight minutes — easy spinning, a few stretches on the bike. Forward fold over the handlebars, hip flexor stretch with one foot on the frame. Take this part seriously. Don’t sprint off the bike the second class ends. Your heart rate and your legs both need the slow descent back to normal.
The Resistance Mistake Every Beginner Makes
This is the section I want printed on a banner and hung in every spin studio I’ve ever walked into.
Beginners almost always start with too little resistance. It feels safer — pedals move easily, the cadence feels controlled, everything seems fine. Until it isn’t. At high cadence with almost no resistance, the flywheel starts pulling your legs around instead of the other way around. Your knees bounce. The movement gets jerky and uncontrolled. Bad workout, bad news for your joints. I watch this happen in nearly every class with new riders.
The fix is counterintuitive — more resistance actually makes the bike easier to control, not harder. Think about the difference between trying to walk on ice versus walking on dry pavement. Grip matters. You want something to push against.
Start at a level where the pedals feel like they have some weight behind them. Your legs should drive the pedals — not the flywheel dragging your legs along. If the bike feels like it’s running away with you, add resistance immediately. When the instructor says “add a turn” and you’re already at near-zero, add two turns just to get to a functional baseline.
The opposite error — burying yourself in resistance — means you’ll grind to a halt trying to keep up with cadence cues. Exhausting in entirely the wrong way. The goal is controlled effort where you feel the burn but you’re still the one in charge. You’ll find that sweet spot by class two or three. First class, lean toward slightly more resistance than your instinct says.
One more thing — never ride at zero resistance. There’s a knob that tightens against the flywheel, and on most Schwinn and Keiser bikes, turning it all the way counterclockwise gives you almost nothing. Don’t. All the impact goes straight into your joints with no muscular engagement to absorb any of it.
After Class Recovery
Frustrated by sore legs and an excess of pride after my very first spin certification ride, I skipped the post-class stretch entirely and went straight home. I could barely walk down stairs for three days. That’s what makes proper recovery so endearing to us cycling instructors — we had to learn it the hard way before we could preach it.
The Soreness
Expect DOMS — delayed onset muscle soreness — for two to three days after your first class. It’ll peak around the 48-hour mark. Quads, hamstrings, glutes, calves, sometimes lower back. All of them will have opinions. This is normal. It means the ride was real.
Stretch immediately after class while your muscles are still warm. Hamstrings — standing forward fold or seated single-leg stretch. Quads — standing quad pull or a half-kneeling lunge. Hold each stretch for 30 to 45 seconds. Not 10. Thirty to forty-five.
Saddle Soreness
But what is saddle soreness, really? In essence, it’s pressure and friction on your sit bones — the ischial tuberosities, those two points you feel when you sit on a hard chair. But it’s much more than just discomfort. It’s universal, it’s temporary, and it is not a sign that your setup is wrong or your body is wrong.
It fades after three or four classes as your body adapts to the saddle. Padded shorts help. Chamois cream — a friction-reducing balm made specifically for cyclists, brands like Chamois Butt’r or DZ Nuts sell tubes for around $15 — helps even more if you’re planning to ride multiple times a week. Apply it directly to skin before riding, not to the shorts themselves.
Hydration
Drink water right after class. Then keep going the rest of the day. A 45-minute session can mean 16 to 32 oz of sweat loss depending on room temperature and your own body — and studios run warm, often 75 to 80°F, because the heat is apparently considered part of the experience. Replace fluids aggressively. Evening class? A small salty snack alongside your water helps replace sodium. Pretzels work. Pickle juice works better, honestly, if you can stomach it.
Come back for class two. Class two is easier than class one — that’s not a pitch, it’s just how the adaptation curve works. Class three is when it starts being actually fun. You deserve to know that before you write off the whole thing based on one very sweaty Tuesday.

Leave a Reply