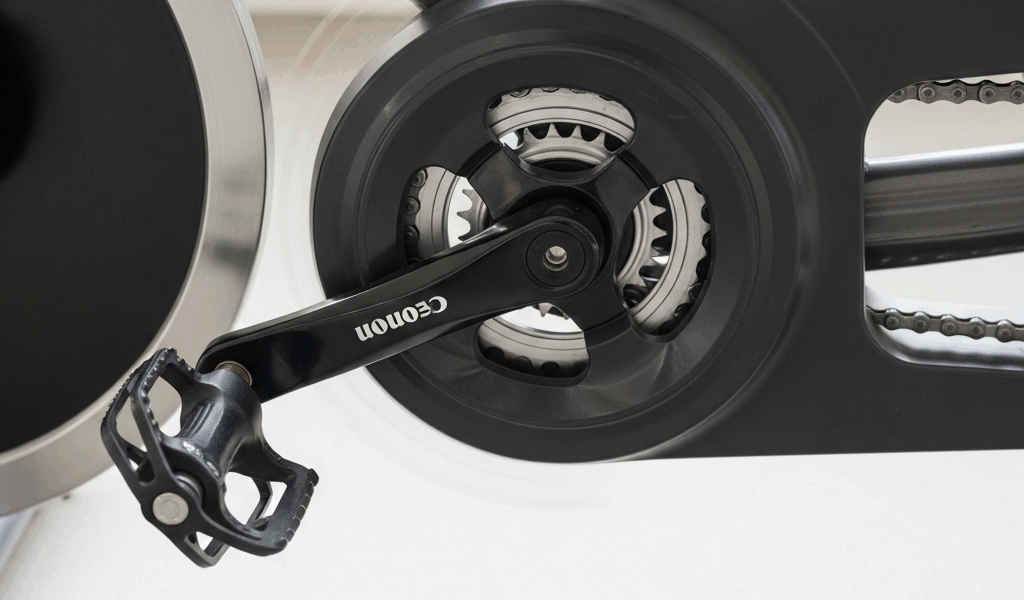
Why Clicking Noises Are So Hard to Track Down
Spin bike clicking noises have gotten complicated with all the conflicting advice flying around. “It’s the flywheel.” “No, it’s the pedals.” “Have you tried tightening the seat post?” Everybody has a theory. I learned everything there is to know about this problem after spending an embarrassing amount of time chasing a click around my Schwinn IC4 — tightening the wrong bolts for two weekends straight. Today, I will share it all with you.
Here’s the core issue nobody explains upfront: sound travels through metal frames. A click originating at your left pedal axle can migrate up through the crank arm, vibrate along the seat tube, and sound — convincingly — like it’s coming from your handlebars. Riders replace parts at random. They spend $40 on new cleats when the actual problem is a loose 14mm bolt. That’s the trap. Map the sound to its physical location first, and the fix usually takes under ten minutes.
Clicking Coming From the Pedals or Crank Area
This is where most clicking problems actually live. Not the flywheel. Not the seat post. The pedals and crank arm — almost every time. Probably should have opened with this section, honestly.
Loose Pedal Threads
Start here. Grab each pedal and wiggle it side to side while the bike is stationary. Not the spinning motion — a lateral wobble, like you’re testing a loose doorknob. Any movement at all means the pedal axle is backing out of the crank arm.
One thing that catches people off guard: pedals have reverse threads on the left side. The left pedal tightens counterclockwise. The right pedal tightens clockwise — normal direction. Mix those up and you’ll loosen what you’re trying to tighten. Use a 6mm or 7mm hex key depending on your pedal model — my Shimano PD-EH500s take a 6mm — or a dedicated pedal wrench if you have one. Snug it down, then add a quarter turn. Not a half turn. Not a full turn. Quarter turn. Test by pedaling slowly at low resistance.
Loose Crank Arm Bolt
Look at the center of your crank arm — the flat face pointing toward you. There’s a large bolt there, usually 14mm or 15mm depending on the manufacturer. On some Peloton models and higher-end Keiser bikes, it’s a pinch bolt system requiring an Allen key instead. Check your manual if you’re not sure what you’re looking at.
Test for play by grabbing the pedal and rocking it side to side — the same lateral wiggle test, not the pedaling direction. Any give at all means this bolt is loose. Tighten it with a socket wrench until there’s zero movement. This bolt handles every watt of force you push through the drivetrain, so don’t be timid about it. No wiggle is the goal.
Worn or Misaligned SPD Cleats
If you’re riding with clip-in shoes, worn cleats produce a rhythmic click — one click per stroke, perfectly timed. The cleat rocks inside the pedal mechanism because the contact points have flattened down. Flip your shoe over and look at the metal cleat plate. If it’s chewed up, scratched smooth, or visibly worn at the edges, that’s your problem. Replacement sets run $20 to $40. I’m apparently a heavy walker between my bike and coffee maker, and Shimano SM-SH51 cleats work for me while generic off-brand cleats never lasted past eight months.
Misalignment is the other culprit. The cleat should sit flush against the pedal platform — no rocking, no side-to-side angle. If it’s shifted even slightly, loosen the three mounting bolts under the shoe using a 2mm or 3mm Allen key, center the cleat, and re-tighten evenly. Don’t make my mistake of eyeballing it. Use the alignment marks molded into the shoe sole if they’re there.
Clicking Coming From the Flywheel or Resistance Area
Flywheel clicks have a different character than pedal clicks — they’re rhythmic and metronomic, one click per full wheel rotation. That regularity is what distinguishes them. A pedal click can vary slightly with your stroke. A flywheel click doesn’t.
Visual Check Without Tools
Stop pedaling and wait for the flywheel and pedals to stop completely. Unplug a powered bike before inspection. If the manufacturer permits a hand-rotation check, rotate only as instructed and keep fingers, clothing, and tools away from the drive system. A repeatable once-per-wheel sound can help isolate the area, but it does not by itself prove a loose or bent flywheel part. Use our safe flywheel clicking and grinding diagnostic before removing a guard or adjusting the resistance mechanism.
Loose Flywheel Bolt
Frustrated by a click that appeared only at higher resistance levels, I once spent 45 minutes checking pedals before finding a slightly loose flywheel center bolt. It was barely loose — maybe an eighth of a turn — but enough. Remove the access shroud first, which is usually held on by four to six Phillips-head screws. Once exposed, you’ll see a large hex bolt at the flywheel center, often 10mm or larger depending on the bike model.
Try to rotate the flywheel opposite to normal pedaling direction. Any give or clicking feel means that bolt needs attention. Tighten clockwise until snug, then stop — a quarter turn past snug is enough. Over-tightening risks stripping threads or cracking the flywheel hub. That’s a $200 repair instead of a two-minute fix.
Worn Belt or Chain With Debris
Look at the drive belt or chain directly. Fraying along a belt edge, flat spots, or rust on a chain link all produce rhythmic clicking — the damaged section slaps the pulley or sprocket once per rotation. Small debris caught near the resistance pad does the same thing. This new idea of checking for debris before replacing parts took off several years later in the spin bike community and eventually evolved into the first-line diagnosis enthusiasts know and practice today.
Belt replacement runs $60 to $150 depending on bike model. Chain replacement is $30 to $80. Both jobs are manageable if you’re comfortable removing bolts and following a diagram, but there’s no shame in letting a technician handle it — particularly on bikes where the drivetrain isn’t easily accessible.
Clicking Coming From the Seat Post or Handlebar Area
Sometimes a click really does come from the seat or handlebars. But what is a seat post click, exactly? In essence, it’s metal-on-metal movement at a joint that should be stationary. But it’s much more than that — it’s usually a symptom of a collar bolt that gets overlooked during every other tightening session.
Loose Seat Post Collar
Grab the seat and try to wiggle it side to side at a fixed height — not adjusting it up or down, just lateral movement. Any play means the collar clamp bolt is loose. Look at the clamp where the seat tube meets the seat post. That bolt is usually 6mm or 8mm. Tighten it until the seat is completely stationary. Light pressure is enough — this isn’t structural in the way a crank bolt is.
Also check the seat rail clamp — the two bolts where the seat body connects to the post rails. Those work loose independently and produce their own click. Both sides. Snug them down evenly.
Handlebar Stem Flexing
Grip the handlebars hard and push down — simulate climbing position. Listen for clicking at that exact moment. A loose stem rocks slightly under that downward load and produces a creak or click. The stem face plate holds three or four bolts, typically 4mm or 5mm hex keys. Tighten them in a cross pattern — tighten one, move to the opposite bolt, then the remaining two. That’s what makes even clamping pressure endearing to us home mechanics — it’s one of those techniques that actually transfers from car work to bike work perfectly.
When the Clicking Does Not Go Away After All of This
You’ve checked pedals, crank bolts, flywheel, seat hardware, and stem hardware. Still clicking. At that point, the bottom bracket is the likely culprit — the spindle assembly inside the frame where the crank rotates. Worn bottom brackets creak and click specifically under load, which is why they’re easy to miss during stationary wiggle tests. Replacement is more involved and worth a dedicated deep-dive article rather than a section here.
If your bike is still under warranty — most manufacturers offer one to three years — contact them before opening up internal components. Defective bottom brackets are typically covered. DIY internal work can void that coverage, and that’s a mistake worth avoiding.
While you won’t need a full workshop setup, you will need a handful of tools: a hex key set covering 2mm through 8mm, a 14mm or 15mm socket wrench, and maybe a pedal wrench. First, you should work through the pedal and crank checks — at least if you want to solve this in under an hour. The honest reality is that loose bolts and worn contact points account for clicking in probably 95 percent of cases. An afternoon and a $15 hex key set from Harbor Freight handles most of it.
If the click includes a momentary loss of drive or a visible derailment, use the spin-bike chain slipping diagnostic before adjusting anything.



Leave a Reply