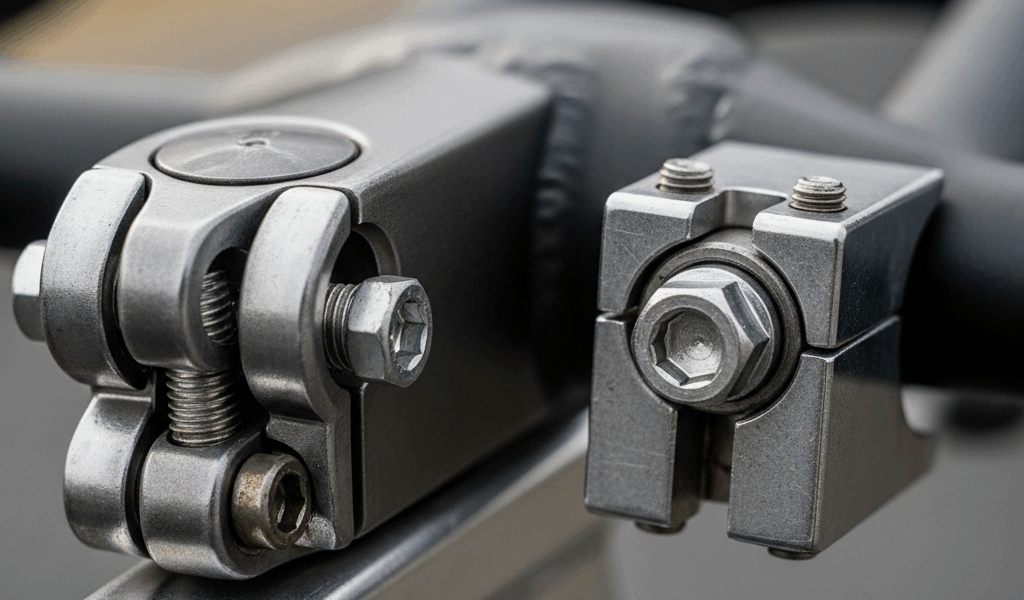
Why Spin Bike Handlebars Work Loose Over Time
Spin bike handlebar troubleshooting has gotten complicated with all the vague, unhelpful advice flying around online. As someone who has spent the last three years diagnosing spin bike failures firsthand, I learned everything there is to know about why handlebars move during rides. Today, I will share it all with you.
There are exactly two reasons this happens — and almost nobody diagnoses them correctly. Most guides lump both failures together, so you end up tightening the wrong bolt entirely and calling a technician anyway. Save yourself the trouble.
The first culprit is stem bolt fatigue. Every hard sprint, every uphill pull — that force travels through your hands, into the bar, straight into the stem collar. Repeat that hundreds of times per ride and the bolt starts to give. Aluminum stems are especially vulnerable. The metal stretches slightly under load. Micro-vibrations from the wheel and drive chain nudge the bolt loose gradually. Slow creep, not dramatic failure.
The second failure point is handlebar clamp slippage. The clamp — that cylindrical collar actually gripping your bar — gives out when people overtighten it. Which, honestly, feels like the logical move. But cheap spin bikes use thin-walled aluminum clamps that simply cannot handle aggressive tightening. Even decent clamps stretch and lose grip if you keep cranking. I once stripped a clamp so badly it needed a full replacement. Should have stopped after feeling the first real resistance. Don’t make my mistake.
How to Tell Which Part Is Actually Moving
Probably should have opened with this section, honestly. Knowing which part is actually failing cuts your repair time in half — at least if you want to fix the right thing on the first attempt.
Before you touch any tools, get on the bike. Grab the handlebars and apply firm lateral pressure. Push left, push right. Don’t be timid. You’re testing, not wrecking.
If the entire bar assembly rotates around the stem axis — handlebars twisting, the whole front structure spinning — that’s a loose stem bolt. The stem itself is pivoting. Movement will feel smooth and rotational, centered right at the top of the stem where it meets the frame. That’s the most common failure on every spin bike I’ve worked on.
If the handlebar moves side to side inside the clamp, or rotates while the stem holds perfectly still, you have clamp slippage. The bar is sliding through the grip collar. Movement here is sloppy and usually one-directional — bar shifts left while the stem stays put, or the bar twists while everything else holds steady. The bar itself is moving. Not the bracket.
That’s what makes diagnosing this correctly so valuable to us riders — once you feel the difference, you’ll never mix them up again. So, without further ado, let’s dive in.
Fix a Loose Stem Bolt Step by Step
- Locate the stem bolt. On most spin bikes it hides under a top cap at the very top of the stem column — or it sits as a single bolt on the front of the stem collar, facing the rider. Check your manual first. Peloton and Schwinn bikes typically use a top-cap bolt. Echelon and most budget models run a front-facing collar bolt instead.
- Identify your tool size. The bolt head is almost always M6 or M8 metric. Measure with calipers or match it against a spare if you have one. Most spin bikes take a 4mm or 5mm hex key — a 10mm wrench if it’s a slotted head. Don’t guess. Measure it.
- Check the bolt condition. Pull it out fully. Look at the threads. Shiny and clean means the bolt is fine and simply worked loose. Flattened or stripped threads mean replacement. More on that shortly.
- Tighten in stages. Hand-tighten until you feel resistance. Then add one-quarter turn with your tool. That’s the entire move. Not a full rotation, not “snug plus a half turn” — one quarter. Aluminum strips faster than you’d expect.
- Retest immediately. Get back on the bike. Push laterally, push rotationally. Movement should be completely gone. If play remains, add one more quarter turn and test again.
I’m apparently heavy-handed with tools and the quarter-turn method works for me while aggressive tightening never does. The reason is straightforward — aluminum expands and contracts with temperature swings and repeated loading. Over-torqueing compresses the metal permanently, which actually speeds up loosening over time.
Fix a Slipping Handlebar Clamp Step by Step
- Loosen all clamp bolts partially. Most clamps have two bolts. Some have three. Back each one off about half a turn. Don’t remove them fully unless you’re replacing the clamp outright.
- Clean the contact surfaces. Dry cloth, inside of the clamp, anywhere it touches the handlebar. Sweat residue and grit genuinely reduce grip. This single step fixes roughly 15% of slippage problems — no tools required.
- Inspect for damage. Look closely for cracks, dents, or shiny stripped patches inside the clamp. Visibly cracked or deformed? Skip straight to the replacement section below.
- Retighten in a cross pattern. Top bolt first, then bottom, then back to the top. This distributes pressure evenly across the clamp. Each bolt gets snug, then a quarter turn — same rule as the stem bolt. No cranking.
- Add carbon assembly paste if available. Finish Line and Park Tool both make versions under $10. Squirt a small amount on the bar where the clamp grips, then retighten. This might be the best option, as clamp slippage requires consistent friction between surfaces. That is because metal-on-metal contact degrades gradually without it — even on bars that once held perfectly.
- Retest under load. Get on and push through a few hard pedal strokes. Movement should be gone. If slippage comes back within a few rides, the clamp itself is the problem.
When to Stop Riding and Replace the Part
Stop riding immediately if the bolt is stripped and won’t tighten, if the clamp shows visible cracks, or if handlebar movement returns within a single session after correct tightening. Any one of those is enough.
Loose handlebars are a fall risk. Hands slip during a hard sprint, balance goes, you go down. Not just annoying — genuinely dangerous.
While you won’t need a full workshop setup, you will need a handful of basic parts. Most spin bike stem bolts are standard M6 or M8 metric hardware — Amazon or any local bike shop, $5 to $15 for a pack. Handlebar clamps are often universal by bar diameter. Measure your bar width and search “spin bike handlebar clamp” plus that measurement. Replacement clamps run $20 to $60 depending on build quality.
First, you should measure your bar diameter before ordering — at least if you want the replacement to fit on the first try. Order the part, wait for delivery, swap it in. Twenty minutes of work. Usually under $40 total. That’s the genuinely good news here.

Leave a Reply